Sunday, October 28, 2012

How to convert a JSON object array in to a javascript object array

Lets assume that this as our JSON array
var jsonEmployeeArray = [
    {"firstname":"Tom", "lastname":"Hunter", "age":"25"}, 
    {"firstname":"Edward", "lastname":"Watson", "age":"30"}, 
    {"firstname":"William", "lastname":"Martin", "age":"45"}
  ];

Now lets create our javascript object so that it has the same properties

function EmployeeObject(firstname, lastname, age) {
  this.firstname = firstname;
  this.lastname = lastname;
  this.age = age;
}

Following is our function which convert the JSON array in to the EmployeeObject array

function convert(jsonArray) {
  var jsEmployeeArray = new Array();//Define our javascript array like this
  for(var i = 0; i < jsonArray.length; i++) {
    var employee = jsonArray[i];//get i th element
    //Create jsObject of type EmployeeObject as below
    var jsObj = 
      new EmployeeObject(employee.firstname, employee.lastname, employee.age);
    jsEmployeeArray[i] = jsObj;//Add created javascript object in to javascript array
  }
  return jsEmployeeArray;
}

That is all. Now call the above 'convert' function as below and it will return you a javascript array.
convert(jsonEmployeeArray);

Wednesday, October 24, 2012

Highlight certain dates in <rich:calendar> component

In this lesson I am going to show you how to highlight certain dates in <rich:calendar> component.
First you should write two classes by implementing 'CalendarDataModel' and 'CalendarDataModelItem' interfaces.
Here I create 'CalendarDataModelImpl' by implementing 'CalendarDataModel' interface and 'CalendarDataModelItemImpl' class by implementing 'CalendarDataModelItem' interface.

My CalendarDataModelImpl class is like this.

import java.util.Calendar;
import java.util.Date;

import javax.faces.bean.ManagedBean;

import org.domain.cpms.entity.AlertTxn;
import org.jboss.seam.ScopeType;
import org.jboss.seam.annotations.Name;
import org.jboss.seam.annotations.Scope;
import org.jboss.seam.framework.EntityQuery;
import org.richfaces.model.CalendarDataModel;
import org.richfaces.model.CalendarDataModelItem;

@Name("calendarDataModelImpl")
public class CalendarDataModelImpl implements CalendarDataModel {
  public CalendarDataModelItem[] getData(Date[] dateArray) {
    CalendarDataModelItem[] modelItems = new 
              CalendarDataModelItemImpl[dateArray.length];
    for (int i = 0; i < dateArray.length; i++) {
      CalendarDataModelItemImpl modelItem = new CalendarDataModelItemImpl();
      modelItem.setEnabled(true);
      for(Date d : getDatesToBeHighlighted()) {
        if(getDatePortion(d).compareTo(  
                       getDatePortion(dateArray[i])) == 0) {
          modelItem.setStyleClass("green");
        }
      }
      modelItems[i] = modelItem;
    }
    return modelItems;
  }

  public Object getToolTip(Date arg0) {
  return null;
  }
 
//This method skips the time part and retuns the date part only
  private Date getDatePortion(Date date) {
    Calendar calendar = Calendar.getInstance();
    calendar.setTime(date);
    calendar.set(Calendar.HOUR_OF_DAY, 0);
    calendar.set(Calendar.MINUTE, 0);
    calendar.set(Calendar.SECOND, 0);
    calendar.set(Calendar.MILLISECOND, 0);
    return calendar.getTime();
  }

//This method returns the dates which should be highlighted
  private Date[] getDatesToBeHighlighted() {
    Date[] dates;
    .....your logic to find dates which should be highlighted...
    return dates;
  }
}

Following method is the most important method in 'CalendarDataModelImpl' class.
public CalendarDataModelItem[] getData(Date[] dateArray) {}

In my xhtml page I add a calendar component as below.
<h:form>
  <rich:calendar popup="false" mode="ajax" dataModel="#{calendarDataModelImpl}"/>
</h:form>

Since we have defined the 'dataModel' attribute in the calendar, when our calendar component is rendered, it passes an array of dates to 'getData' method in our 'CalendarDataModelImpl' class.
So now we iterate through that array and set our own css class name for each date that we need to be highlighted.

public CalendarDataModelItem[] getData(Date[] dateArray) {
    CalendarDataModelItem[] modelItems = new
                    CalendarDataModelItemImpl[dateArray.length];
      for (int i = 0; i < dateArray.length; i++) {
    CalendarDataModelItemImpl modelItem = new
                            CalendarDataModelItemImpl();
    modelItem.setEnabled(true);//Enable the date
  for(Date d : getDatesToBeHighlighted()) {//your method which returns an array 
                                                 //of dates which should be highlighted
          if(getDatePortion(d).compareTo(
                getDatePortion(dateArray[i])) == 0) {//comparing our date with dates in                                                      //dateArray
              modelItem.setStyleClass("green");                                 
  }
  }
  modelItems[i] = modelItem;
    }
    return modelItems;
  }

My CalendarDataModelItemImpl class is as below. It contains only several getter and setter methods.

import org.richfaces.model.CalendarDataModelItem;

public class CalendarDataModelItemImpl implements CalendarDataModelItem {
    private boolean enabled;
    private String styleClass;

    public void setEnabled(boolean enabled) {
        this.enabled = enabled;
    }

    public void setStyleClass(String styleClass) {
        this.styleClass = styleClass;
    }

    public boolean isEnabled() {
        return enabled;
    }

    public String getStyleClass() {
        return styleClass;
    }

    public Object getData() {
        return null;
    }

    public boolean hasToolTip() {
        return false;
    }

    public Object getToolTip() {
        return null;
    }

    public int getDay() {
        return 0;
    }
}

That is it.

Thursday, July 19, 2012

Compare two dates in two <rich:calendar> components

In this lesson Im going to show you how to compare the dates of two &lt;rich:calendar> components in a JSF page.

For an example think that you are creating a JSF page to enter employee details.
In that page you have two calendar components. One is to enter the join date and the other one is to enter the retired date of the employee.
So obviously join date should be earlier than the retired date. How do you validate whether join date is earlier than retired date and show a rich:message if validation failed?

1) Method 1 (For JSF users)
If you are not using JBoss SEAM, this method is for you. (Its obvious that SEAM users also can use this method.)

First, you have to create a validator class as below.


package inova;
import java.text.ParseException;
import java.text.SimpleDateFormat;
import java.util.Date;
import javax.faces.application.FacesMessage;
import javax.faces.component.UIComponent;
import javax.faces.component.UIInput;
import javax.faces.context.FacesContext;
import javax.faces.validator.Validator;
import javax.faces.validator.ValidatorException;


public class DateComparator implements Validator {
public void validate(FacesContext context, UIComponent component, Object date1) throws ValidatorException {
Date joinedDate = (Date) date1;
UIInput retiredDateComponent = 
           (UIInput) component.getAttributes().get("retiredDateComponent");

String dateString = (String) retiredDateComponent.getSubmittedValue();
System.out.println("dateString>" + dateString);
        String pattern = "yyyy/MM/dd hh:mm";
        SimpleDateFormat dateFormat = new SimpleDateFormat(pattern);
        Date retiredDate;
        try {
        retiredDate = dateFormat.parse(dateString);        
        } catch (ParseException e) {
            e.printStackTrace();
            return;
        }
        System.out.println("retiredDate> " + retiredDate);
if (joinedDate == null || retiredDate == null) {
            return;
}
        if (joinedDate.compareTo(retiredDate) > 0) {
        retiredDateComponent.setValid(false);
            throw new ValidatorException(new FacesMessage("Retired date should be 
                greator than joined Date"));
        }
    }
}
Now register your validator class in your 'faces-config.xml' file. To do it add the following lines directly within the <faces-config> tags.


<validator-id>dateComparator</validator-id>
  <validator-class>inova.DateComparator</validator-class>
</validator>
Note that 'dateComparator' is the name by using which you are going to access the validator in your page. You can give any name for this.

If you are using a date pattern in your second calendar(end date) component, you have to use the same date pattern in your validator class.
Your page will be as below.


<html xmlns="http://www.w3.org/1999/xhtml"
      xmlns:h="http://java.sun.com/jsf/html"
      xmlns:rich="http://richfaces.org/rich"
      xmlns:a4j="http://richfaces.org/a4j"
      xmlns:c="http://java.sun.com/jstl/core"
      xmlns:f="http://java.sun.com/jsf/core"> 


<head></head> 
<body>
  <h:form>
    Start date : 
    <rich:calendar id="cal_1">
      <f:validator validatorId="dateComparator"/>
      <f:attribute name="endDateComponent" value="#{endDate}"/>
    </rich:calendar>
    <br/>
    End date : <rich:calendar binding="#{endDate}" datePattern="yyyy/MM/dd hh:mm"/> 
    <br/>
    <rich:message for="cal_1" style="color:red;"/>
    <br/>
    <a4j:commandButton value="Save"/>
  </h:form>
</body> 
</html>

That is all. I think its clear for you what we have done.
♫ In our xhtml page we bind the 'end date calendar' component to the variable named as 'endDate' by using the 'binding' attribute of it.
♫ Then in our 'start date calendar' component, we use it as an attribute.
♫ In our validator class, we get that attribute by using the 'component.getAttributes().get(....)' method. Then we get the end date.
♫ If two dates are valid according to our criteria, we have nothing to do and if dates are invalid we throws a 'ValidatorException' with our own message.

2) Method 2(For seam users only)
This way is easier than the above method.
 The validator class is almost the same as above except three annotations are introduced before the class name as below.


@Name("dateComparator")
@org.jboss.seam.annotations.faces.Validator
@BypassInterceptors
public class DateComparator implements Validator {
..........
}
✱  Nothing to be put in faces-config.xml. It means you don't need to register your validator class in  faces-config.xml as in method1.

Enjoy......

Monday, July 9, 2012

Dynamically create tabs in <rich:tabPanel> component

In JSF you may have used <a4j:repeat> tag to repeat UI components. For an example you can use <a4j:repeat> tag as below to dynamically create several check boxes.

  <a4j:repeat value="#{userRoleList.resultList}" var="userRole">
    <h:selectBooleanCheckbox/>Click me<br/>
  </a4j:repeat>

The result will be as below.


But this doesn't work with <rich:tabPanel> and <rich:tab> components.
Is there any solution for this?
Yes, your old friend <c:forEach> component is still ready to help you.
Really you can use <c:forEach> of JSTL in your JSF page.
Following is an example. Required parts are colored.

<html xmlns="http://www.w3.org/1999/xhtml"
      xmlns:h="http://java.sun.com/jsf/html"
      xmlns:rich="http://richfaces.org/rich"
      xmlns:c="http://java.sun.com/jstl/core"


<head></head> 
<body>
  <rich:tabPanel switchType="client">
    <c:forEach items="#{userRoleList.resultList}" var="userRole">
      <rich:tab label="Tab#{userRoleList.resultList.indexOf(userRole) + 1}">
        I am tab no. #{userRoleList.resultList.indexOf(userRole) + 1}
      </rich:tab>
    </c:forEach>
  </rich:tabPanel>
</body> 
</html>

Final result will be as below.

Tuesday, July 3, 2012

How to use <rich:listShuttle> component


In 'ListShuttle' component you have two lists.
The left hand side list is the Source list.Right hand side list is the Target list. When moving an item between two lists, it is passed as a String. So you have to write a converter class to convert this String again to the object. So in order to do this correctly you may need to override the 'toString' method of the class
which you are using as the list item.

In this example I am using following 'UserData' calss to represent an item in the list. So my source list and
target lists has the type of 'UserData'.
Note that 'toString' method in 'UserData' has been overridden.

public class UserData {
String userName;
Integer userId;
public String getUserName() {
  return userName;
  }
public void setUserName(String userName) {
  this.userName = userName;
  }
public Integer getUserId() {
  return userId;
  }
public void setUserId(Integer userId) {
  this.userId = userId;
  }
  @Override
  public String toString() {
    return this.userId + "," + this.userName;
  }
}


My converter class is as below. It can convert a 'UserData' object to a String and, a String representation of 'UserData' object back to a 'UserData' object.
Following three annotations are must
@Name("userDataConverter") - This indicates the converter Id()
@Converter - This registers this class as a converter
@BypassInterceptors - Disabling interceptors.


import javax.faces.component.UIComponent;
import javax.faces.context.FacesContext;
import org.jboss.seam.annotations.Name;
import org.jboss.seam.annotations.faces.Converter;
import org.jboss.seam.annotations.intercept.BypassInterceptors;


@Name("userDataConverter")
@Converter
@BypassInterceptors
public class UserDataConverter implements javax.faces.convert.Converter {


  public Object getAsObject(FacesContext fContext, UIComponent uiComp, String value) {
UserData userData = new UserData();
String[] parts = value.split(",");
userData.setUserId(Integer.valueOf(parts[0]));
userData.setUserName(parts[1]);
return userData;
  }


  public String getAsString(FacesContext fContext, UIComponent uiComp, Object obj) {
UserData userData = (UserData) obj;
return userData.toString();
  }
}

My seam class which is bound to the page is as below.

import java.util.ArrayList;
import java.util.List;
import org.jboss.seam.annotations.Name;


@Name("myBean")
public class MyBean {
List<UserData> sourceData;
List<UserData> targetData = new ArrayList<UserData>();

public MyBean() {
sourceData = new ArrayList<UserData>();
UserData u = new UserData();
u.setUserId(100);
u.setUserName("John");
sourceData.add(u);
UserData u2 = new UserData();
u2.setUserId(101);
u2.setUserName("Kate");
sourceData.add(u2);
}

public List<UserData> getSourceData() {
return sourceData;
}

public List<UserData> getTargetData() {
return targetData;
}
}

Finally the ListShuttle component in my xhtml page is this.

    <rich:listShuttle sourceCaptionLabel="All users" targetCaptionLabel="Selected users"  orderControlsVisible="true"  sourceValue="#{myBean.sourceData}" var="userData" 
   targetValue="#{myBean.targetData}" converter="userDataConverter">
      <rich:column width="60px">
        <f:facet name="header">
          <h:outputText value="Username"/>
        </f:facet>
        <h:outputText style="cursor:pointer;" value="#{userData.userName}" />
      </rich:column>
      <rich:column width="60px">
        <f:facet name="header">
          <h:outputText value="Id" />
        </f:facet>
        <h:outputText style="cursor:pointer;" value="#{userData.userId}" />
      </rich:column>
    </rich:listShuttle>

Customize JSF selectOneRadio component

The general use of  '<h:selectOneRadio>' component is as below

    <h:selectOneRadio>
      <f:selectItem itemLabel=": Cheque" itemValue="1" />
      <f:selectItem itemLabel=":Cash" itemValue="2" />
    </h:selectOneRadio>

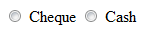
The appearance of finally rendered component is as below. The Select Items are laid horizontally by default.


If you want to arrange them vertically then change the 'layout' attribute as below.

    <h:selectOneRadio layout="pageDirection">
      <f:selectItem itemLabel="Cheque" itemValue="1" />
      <f:selectItem itemLabel="Cash" itemValue="2" />
    </h:selectOneRadio>


However if you want to place the labels of 'Select Items' components before the radio buttons you have to use css.


    <style>
      .myRad td {
          text-align:right;
      }
      .myRad td input {
          float:right;
          width:35px;
      }
    </style>


    <h:selectOneRadio layout="pageDirection" styleClass="myRad">
      <f:selectItem itemLabel="Cheque :" itemValue="1" />
      <f:selectItem itemLabel="Cash :" itemValue="2" />
    </h:selectOneRadio>

Final result will be as below.


Monday, February 27, 2012

EJBQL Delete Query Example

If you have worked with SEAM you may have used the method "entityManager.remove()" which is used to delete an entry from database. This method accepts one parameter, which is an entity.
(However the entity should be a managed one. Otherwise it throws an exception saying that you are trying to remove a detached object.)
You can use an EJBQL query to delete a record from database directly. In this case no managed entity is required. Following is an example query, which deletes one record from "Client" table.
It deletes the client whose clientId is 10.

DELETE FROM Client client where client.clientId = 10

Now I am going to use SEAM managed EntityManager to create a Query object as below and execute the query by calling it's "executeUpdate()" method.

Injecting EntityManager.
@In
EntityManager entityManager

Creating and executing query
Query q = entityManager.createQuery("DELETE FROM Client client where client.clientId                                       = 10");
q.executeUpdate();//delete row

Wednesday, February 15, 2012

How to create a popup in seam using <rich:ModalPanel/> component
(Seam, JSF, Richfaces)

In this popup a '' component is used as the popup.
In your page body, create a Modal Panel component as below. I am using the 'header' facet to display the title.

You can add more components such as tables, input fields, etc. between <rich:ModalPanel></rich:ModalPanel>
tags.
Look that I am using a command button to hide the popup.
<rich:modalPanel id="myPopup" width="600" height="400">
  <f:facet name="header"> 
    <h:panelGroup>
      <h:outputText value="Hello Popup!!"></h:outputText>
    </h:panelGroup>
  </f:facet>
  <a4j:commandButton value="Hide" id="btn_hide"
              onclick="Richfaces.hideModalPanel('myPopup');"/>
</rich:modalPanel>

That is it.
Now run your page and open it using a browser. It displays nothing. This is because components are hidden by default.
Now edit your page and add another button as below.

<a4j:commandButton value="Show" onclick="Richfaces.showModalPanel('myPopup');"/>

Note that in this button our javascript is "Richfaces.showModalPanel('myPopup');".
Now run your page and click on 'Show' button. You will see the popup. Now click the 'Hide' button and the popup will be closed.

Another Way To Show/ Hide Popup
Instead of using javascripts you can use a '<rich:componentControl/>' tags to show and hide the popup.
In that case your 'Show' button would be as below.
<a4j:commandButton value="Show" id="btn_show">
  <rich:componentControl for="myPopup" attachTo="btn_show"
        operation="show" event="onclick"/>
</a4j:commandButton>
'Hide' button can be changed as below.
<a4j:commandButton value="Hide" id="btn_hide">
  <rich:componentControl for="myPopup" attachTo="btn_hide" 
        operation="hide" event="onclick"/>
</a4j:commandButton>

Custom converter class
(Seam, JSF, Richfaces)

I'm going to show you how to write a custom converter class to let users to select and pass an Object using a JSF's <h:selectOneMenu/> component.
Since this component is finally rendered as a HTML 'select' element, it can't hold or submit Objects. So you need a converter class to convert the submitted value to matching Object type.
I am using following simple class as the seam component. Seam name of it is 'test'. (Instead of the seam component you can use a JSF managed bean also)
The combo box I'm going to use is filled with 'datesSelectList'.
The selected date is going to be set to 'selectedDate' variable.

import java.util.*;
import org.jboss.seam.ScopeType;
import org.jboss.seam.annotations.*;
import javax.faces.model.SelectItem;

@Name("test")
public class Test {
  List<SelectItem> datesSelectList = new ArrayList<SelectItem>();
  Date selectedDate;

  @Create
  public void init() {
    buildDatesSelectList();
  }

  public List<SelectItem> getDatesSelectList(){
    return datesSelectList;
  }

  public void buildDatesSelectList(){
    Date baseDate = new Date();
    Date date1 = new Date(baseDate.getTime());
    Date date2 = new Date(baseDate.getTime() + 5000);
    Date date3 = new Date(baseDate.getTime() + 10000);
    datesSelectList.add(new SelectItem(date1, "Date 1"));
    datesSelectList.add(new SelectItem(date2, "Date 2"));
    datesSelectList.add(new SelectItem(date3, "Date 3"));
  }

  public Date getSelectedDate() {
    return selectedDate;
  }

  public void setSelectedDate(Date selectedDate) {
    System.out.println("Date Selected : " + selectedDate);
    this.selectedDate = selectedDate;
  }
}

Your page would be as below.
<h:form>
  <h:selectOneMenu value="#{test.selectedDate}" id="sList">
    <s:selectItems value="#{test.datesSelectList}" var="_date"
       itemValue="#{_date.value}" label="#{_date.label}" />
    <f:converter converterId="myDateConverter"></f:converter>
  </h:selectOneMenu>
  <rich:message for="sList"/><br/>
  <a4j:commandButton value="submit"/>
</h:form>

Now it is time to write our converter class. To do that I will have to implement the interface 'javax.faces.convert.Converter'.
In this example the user selects a Date from combo box, and that date value should be set to the 'selectedDate' variable through 'setSelectedDate()' method.
So our converter should capture the label of the selected date('Date 1', 'Date 2' or 'Date 3') and find the relevant Date object.

package inova.erp.jbpm.temp;
import java.util.*;
import javax.faces.component.UIComponent;
import javax.faces.context.FacesContext;
import javax.faces.convert.Converter;
import javax.faces.model.SelectItem;
import org.jboss.seam.Component;


public class DateConverter implements Converter {
  
  public Object getAsObject(FacesContext context, UIComponent uiComp, String dateString) {
    System.out.println("dateString = " + dateString);
    Object obj = Component.getInstance("test");
    Test test = (Test)obj;
    List<SelectItem> selectItems = test.getDatesSelectList();
    for(SelectItem sItem : selectItems) {
      if(sItem.getLabel().equals(dateString)) {
        return (Date)sItem.getValue();//Finding matching Date
         object for selected label (dateString) 
      }
    }
    return null;
  }
  public String getAsString(FacesContext context, UIComponent uiComp, Object dateObj) {
    return null;
  }
}

Now our work is almost ok. The final part is we have to introduce our new "DateConverter" class as a converter. We can do it in 'faces-config.xml' as below.
<converter>
  <converter-id>myDateConverter</converter-id>
  <converter-class>  
    inova.erp.jbpm.temp.DateConverter
  </converter-class>
</converter>

Now build and run the page. Then select a value from combo box and press 'Submit' button.
You will see the output similar to 'Date Selected : Tue Feb 14 19:51:24 IST 2012' in your console.
It indicates that you have successfully selected a Date Object using your combo box.
Now remove the line
  '<f:converter converterId="myDateConverter"></f:converter>'
 and try again. You will get an error at submission.

Note Followings:

  • You can add the "converter" attribute to the <h:selectOneMenu/> and remove the <f:converter/> component as below.
    <h:form>
      <h:selectOneMenu value="#{test.selectedDate}" id="sList" converter="myDateConverter">
        <s:selectItems value="#{test.datesSelectList}" var="_date"
           itemValue="#{_date.value}" label="#{_date.label}" />
      </h:selectOneMenu>
      <rich:message for="sList"/><br/>
      <a4j:commandButton value="submit"/>
    </h:form>
  • If you are using seam, you can use the seam annotation '@Converter' together withe '@Name' annotation to define the converter instead editing 'faces-config.xml'.

    import org.jboss.seam.annotations.Name;
    import org.jboss.seam.annotations.faces.Converter;
    import org.jboss.seam.annotations.intercept.BypassInterceptors;
    @Name("myDateConverter")
    @Converter
    @BypassInterceptors
    public class DateConverter implements javax.faces.convert.Converter {

Tuesday, February 14, 2012

Reflect live back end data on webpage using <a4j:poll/> component
(Seam, JSF, Richfaces)

You can use <a4j:poll/> component to do following things.
1. Run a java method periodically. (Ex:- Run auto save method)
2. Rerender another component periodically to display recent data from database.
3. Periodically run a javascript.
4. To accomplish three of above at the same time.

<h:form>
  <a4j:poll interval="1000" reRender="txtAlertCount" action="#{myBean.queryFromDb()}"/>
</h:form>
<h:outputText value="#{myBean.rowCount()}" id="txtAlertCount" />

Main attributes:
interval - time duration in milliseconds
action - method to be invoked in given intervals
reRender - Id of the component to be re-rendered
oncomplete - Javascript function to run after action is completed.
onsubmit - Javascript function to run before form submission

Friday, February 10, 2012

Format string with leading zeros to have a fixed length

For an example lets think that you need to format a string so that it always has the length of 8 characters. Following method always returns a String which has the length of 8.

private String formatString(String myString) {
   String baseString = "00000000";//8 zeros
   String tempString = baseString + myString;
   return tempString.substring(myString.length());
}

Wednesday, December 21, 2011

How to get width and height of an image in Java

Following method can be used to get width and height of jpg, gif, or png file
import javax.swing.ImageIcon;

public void printSize(){
  ImageIcon jpegImage = new
  ImageIcon("C:\\Users\\prageethj\\Desktop\\cute.jpg");
  int height = jpegImage.getIconHeight();
  int width = jpegImage.getIconWidth();
  System.out.println(width + "x" + height);
}

Database Access in Java (JDBC Example)

Accessing and retrieving data from a database is very simple.
First of all you need to add the DB driver(.jar) to your project. After that you can use below code.
In this example I am using mySql database.
//load DB driver
Class.forName("com.mysql.jdbc.Driver");
//this is the connection string
String connString 
   = "jdbc:mysql://localhost:3306/mydb?user=root&password=";  
//Create connection
Connection con = DriverManager.getConnection(connString);
//Create a Statement object using connection
Statement statement = con.createStatement();
//Execute the SQL statement and get the results as a Resultset(Note that the name of the table is 'employee')
ResultSet resultSet = statement.executeQuery("select * from 
           employee");
//Now we can iterate through the resultSet 
while(resultSet.next()){
//following method returns the value in Object type. 
//'name_full' is the column name
  Object o = resultSet.getObject("name_full");
  System.out.println(o);
//following method returns the value in String type.
 String s = resultSet.getString("name_full");
}
//Close the Statement object and Connection object.
statement.close();
con.close();
Note that you can remove above first two lines of the code and replace third line from below line to get the same result.
Connection con = DriverManager.getConnection("jdbc:mysql://localhost:3306/mydb", "root", "");

How to add and subtract years, months and days using Calendar class

In Java the best option for you is using the Calendar object.
Calendar c = Calendar.getInstance();//Create Calendar instance
Date today = c.getTime();//Initially this returns today
System.out.println(today);

c.add(Calendar.YEAR, 10);//Add 10 years
c.add(Calendar.MONTH , 1);//Add a month
c.add(Calendar.DATE, 5);//Add 5 days
Date futureDay = c.getTime();
System.out.println(futureDay);

Note that when you are using the Calendar class you need not to bother about number of days the month contains, leap years etc.
Similarly in order to subtract 10years just use -10 as below
c.add(Calendar.YEAR, -10);//Subtract 10 years

Friday, May 20, 2011

How to take a screenshot of your desktop

This tutorial shows you how to capture a screenshot of your desktop.
import java.io.File;
import javax.imageio.ImageIO;
import java.awt.Rectangle;
import java.awt.Robot;
import java.awt.image.BufferedImage;

try {
  Robot robot = new Robot();
  //I assume that the size of the image you want is 300 x 200
  BufferedImage img = robot.createScreenCapture(new                                                Rectangle(300,200));
  //I am saving the image as a png image
  //But you can use any other image formats like bmp, jpg etc.
  ImageIO.write(img, "png", new File("D:/screen.png"));
} catch (Exception ex) {
  ex.printStackTrace();
}

Ok. But sometimes you may want to capture the whole screen.
So you have to import Toolkit first.
import java.awt.Toolkit;

Your new code will look like this.
try {
  Robot robot = new Robot();
  Rectangle rect = new Rectangle( Toolkit.getDefaultToolkit().getScreenSize());
  BufferedImage img = robot.createScreenCapture(rect);
  ImageIO.write(img, "png", new File("D:/screen.png"));
} catch (Exception ex) {
  ex.printStackTrace();
}

Thursday, May 19, 2011

How to execute a DOS command using Java.

As you know "mkdir" is the DOS command which lets you create a new folder at a given location.
In order to create a folder named as "MyFolder" in your "C:" drive you can use the following command.
>>mkdir c:\MyFolder

But in java you need to do an additional work to execute this command.
So you have to add "cmd /c" to your command.
Following code creates a new folder named as "MyFolder" in drive "C:".
String cmd = "cmd /c";
String command = "mkdir";
String folderName = "C:\\MyFolder";
Runtime.getRuntime().exec(cmd + " " + command + " " + folderName);

But what will happen if your folder name contains space characters.
For an example if the name of your folder was "My Folder" instead of "MyFolder".
Then you should add extra double quotes and escape them as below.
String folderName = "C:\\\"MyFolder\"";

How to replace a character or a word at a given position in Java.

Lets assume that you want to replace the 7th character ("-") in following string with "*" character.
Then you can do it as below.
String s = "I*LIKE-JAVA BUT MY FRIEND LIKE .NET.";
System.out.println(s.substring(0,6) + "*" + s.substring(6 + 1));

Note that in above string there are two occurances of the word "LIKE".
If you want to replace the first occurances of the word "LIKE" with the word "LOVE" then you can do it as below.
String s = "I*LIKE-JAVA BUT MY FRIEND LIKE .NET.";
System.out.println(s.substring(0,2) + "LOVE" + s.substring(2 + 4));

Below example shows you how to remove a character at a certain position.
In this example we remove the "*" characterfrom the text.
String s = "WE*LIKE";
System.out.println(s.substring(0,2) + s.substring(3));

If you want to remove all the "*" from the string "I*LOVE*JAVA" then you can use below method.
String initialString = "I*LOVE*JAVA";
String result = "";
for (int i = 0; i < initialString.length(); i ++) {
 if (initialString.charAt(i) != '*') {
  result += initialString.charAt(i);
 }
}
System.out.println(result);

Read a file line by line

 In this example I explain how to read a file line by line and add the lines to a List.

import java.io.BufferedReader;
import java.io.FileReader;
import java.io.IOException;
import java.util.ArrayList;
import java.util.List;
import javax.swing.JOptionPane;

public static void main(String[] args) throws IOException {
  String fileName = "c:\\camera.log"; \\Path to your file
  FileReader reader = new FileReader(fileName);
  BufferedReader buffReader = new BufferedReader(reader);
  List linesList = new ArrayList();
  String line;
  while((line = buffReader.readLine()) != null){
    linesList.add(line);
  }
  //For this example I just show a message box to display the content of the file.
  JOptionPane.showMessageDialog(null, linesList.toArray());
}

Increase the size of an array

In Java there is no direct way to increase the size of an array after is is defined.
In this post I will show you how to do this easily.
Think you have following array. The size of this array is 1.

String[] arr = new String[1];

Now you can increase the size of your array like this.(replace the word "NEW_SIZE" with your new size)

arr=(String[]) Arrays.asList(arr).toArray(new String[NEW_SIZE]);

Wednesday, March 9, 2011

How to read a file line by line in Java

In this example I explain how to read a text file line by line and add the lines to a List.
 import java.io.BufferedReader;
 import java.io.FileReader;
 import java.io.IOException;
 import java.util.ArrayList;
 import java.util.List;
 import javax.swing.JOptionPane;


 public static void main(String[] args) throws IOException {
   String fileName = "c:\\camera.log"; \\This is the path to your
                                       file
   FileReader reader = new FileReader(fileName);
   BufferedReader buffReader = new BufferedReader(reader);
   List<string> linesList = new ArrayList<string>();
   String line;
   while((line = buffReader.readLine()) != null){
     linesList.add(line);
   }
   //For the purpose of this example I just show a message box to
    display the content of the file.
   JOptionPane.showMessageDialog(null, linesList.toArray());
}