Showing posts with label Seam. Show all posts

Saturday, December 1, 2012

How to use rich:beanValidator together with Hibernate annotations to validate input components

<rich:beanValidator/> component from Richfaces is very useful because it lets us validate input components by using Hibernate annotations. This highly reduces our need of writing validator classes.

This tutorial will show you how to use this component with @NotNull annotation to avoid NULL inputs and to display a custom message.

Create a JSF managed bean or a SEAM component as below.
public class MyBean {
  Integer number;
  
  @NotNull(message = "Please enter a value")
  public Integer getNumber() {
    return number;
  }

  public void setNumber(Integer number) {
    this.number = number;
  }
}

You need to add this import.
import org.hibernate.validator.NotNull;

This is your xhtml page.
<h:form>
  <h:inputText value="#{myBean.number}" id="txtNumber">
    <rich:beanValidator/>
  </h:inputText>
  <rich:message for="txtNumber"/>
  <a4j:commandButton value="Submit"/>
</h:form>

In this page we have a <h:inputText>  component. inside it we have a <rich:beanValidator/> component. What that component does is when the user enters a value and click the button that value is validated according to the hibernate annotations in the bean class. In this example since we have used the @NotNull annotation, the value is checked for null. If the value is null then our message "Please enter a value" is displayed in the <rich:message> component.

Similarly toy can use <rich:beanValidator/> component with other Hibernate validator annotations.

✔  You can find a list of validator annotations here

    If your page contains lot of input components you would have to put <rich:beanValidator/>s inside each of them. But it could be painful. So Richfaces introduces another component for this. It is <rich:graphValidator/> component. Instead of using <rich:beanValidator/>s inside each element, you can get the same result by wrapping all the input elements with only one <rich:graphValidator/> as below.


<h:form>
  
  <rich:graphValidator>
    <h:inputText value="#{myBean.number}" id="num" />
    <rich:message for="num" /><br />

    <rich:calendar value="#{myBean.date}" id="dte" />
    <rich:message for="dte" /><br/>
     </rich:graphValidator>

  <a4j:commandButton value="Save" />
</h:form>

Internationalize your seam application

► What is Internationalization?
  In computing, Internationalization (or i18n) can be described as "making your application to be easily adapted to more than one locale".

► How to implement Internationalization in your SEAM project 
   This is not very much difficult. This tutorial will guide you through the steps.

If you open the faces-config.xml file in your WEB-INF folder you will see there are several locales already defined in it as below.
<application>
........
    <locale-config>
      <default-locale>en</default-locale>
      <supported-locale>bg</supported-locale>
      <supported-locale>de</supported-locale>
      <supported-locale>en</supported-locale>
      <supported-locale>fr</supported-locale>
      <supported-locale>tr</supported-locale>
    </locale-config>
</application>

You can add or remove <supported-locale> tags as necessary.

    Now open the resource directory of your web project and you will see the file messages_en.properties. Note the name of the file. Similarly you can create multiple files by naming like messages_<locale>.properties.
These files store texts in various languages, so that when you change the locale, the text is displayed in relevant language.
In this example we are going to show the welcome message in japanese when the user select the Japanese locale.

Let's start...
First add a <supported-locale> tag to the faces-config.xml file which includes japanese locale.
The locale code for Japanese is "ja".  So add
<supported-locale>ja</supported-locale>

Then create the file messages_ja.properties in your resource directory.
Add this line to messages_en.properties file.
welcome_msg=Welcome

Add this line to messages_ja.properties file.
welcome_msg=歓迎


Now what we want is to display the welcome message in English if the locale is en and to display the welcome message in Japanese if the locale is ja.

We are going to use the built-in seam component localeSelector.
Add this code in to your page.
<h:form>
  <h:selectOneMenu value="#{localeSelector.localeString}">
    <f:selectItems value="#{localeSelector.supportedLocales}"/>
    <a4j:support event="onchange" reRender="txtMsg"/>
  </h:selectOneMenu>
  <h:outputText id="txtMsg" value="#{messages.welcome_msg}!"/>
</h:form>

I think it is not necessary to explain what above code does.
Yes, when you select a locale from the combo box it displays the welcome message from the selected language.
Note: You can use #{messages['helloWorld']} instead of #{messages.welcome_msg}. Both give the same result.

See the result...
Save and deploy your application. Open the browser, type the url and go to the page.
Open the combo box and you will see something like this.


Now select the Japanese locale and it should display the message in Japanese language.

Problem....?
Unfortunately you may not get the expected result. You may see something weird like this.


Don't worry. The reason is this.
In .properties  files ISO 8859-1 character encoding is used to encode the input/output stream. Characters which can't be directly represented in this encoding have to be written using Unicode escapes.
So edit your messages_ja.properties file as below.
welcome_msg=\u6B53\u8FCE

Wow... Now you get the desired result.


Note: There are lot of online Unicode escape applications.This is one

Wednesday, October 24, 2012

Highlight certain dates in <rich:calendar> component

In this lesson I am going to show you how to highlight certain dates in <rich:calendar> component.
First you should write two classes by implementing 'CalendarDataModel' and 'CalendarDataModelItem' interfaces.
Here I create 'CalendarDataModelImpl' by implementing 'CalendarDataModel' interface and 'CalendarDataModelItemImpl' class by implementing 'CalendarDataModelItem' interface.

My CalendarDataModelImpl class is like this.

import java.util.Calendar;
import java.util.Date;

import javax.faces.bean.ManagedBean;

import org.domain.cpms.entity.AlertTxn;
import org.jboss.seam.ScopeType;
import org.jboss.seam.annotations.Name;
import org.jboss.seam.annotations.Scope;
import org.jboss.seam.framework.EntityQuery;
import org.richfaces.model.CalendarDataModel;
import org.richfaces.model.CalendarDataModelItem;

@Name("calendarDataModelImpl")
public class CalendarDataModelImpl implements CalendarDataModel {
  public CalendarDataModelItem[] getData(Date[] dateArray) {
    CalendarDataModelItem[] modelItems = new 
              CalendarDataModelItemImpl[dateArray.length];
    for (int i = 0; i < dateArray.length; i++) {
      CalendarDataModelItemImpl modelItem = new CalendarDataModelItemImpl();
      modelItem.setEnabled(true);
      for(Date d : getDatesToBeHighlighted()) {
        if(getDatePortion(d).compareTo(  
                       getDatePortion(dateArray[i])) == 0) {
          modelItem.setStyleClass("green");
        }
      }
      modelItems[i] = modelItem;
    }
    return modelItems;
  }

  public Object getToolTip(Date arg0) {
  return null;
  }
 
//This method skips the time part and retuns the date part only
  private Date getDatePortion(Date date) {
    Calendar calendar = Calendar.getInstance();
    calendar.setTime(date);
    calendar.set(Calendar.HOUR_OF_DAY, 0);
    calendar.set(Calendar.MINUTE, 0);
    calendar.set(Calendar.SECOND, 0);
    calendar.set(Calendar.MILLISECOND, 0);
    return calendar.getTime();
  }

//This method returns the dates which should be highlighted
  private Date[] getDatesToBeHighlighted() {
    Date[] dates;
    .....your logic to find dates which should be highlighted...
    return dates;
  }
}

Following method is the most important method in 'CalendarDataModelImpl' class.
public CalendarDataModelItem[] getData(Date[] dateArray) {}

In my xhtml page I add a calendar component as below.
<h:form>
  <rich:calendar popup="false" mode="ajax" dataModel="#{calendarDataModelImpl}"/>
</h:form>

Since we have defined the 'dataModel' attribute in the calendar, when our calendar component is rendered, it passes an array of dates to 'getData' method in our 'CalendarDataModelImpl' class.
So now we iterate through that array and set our own css class name for each date that we need to be highlighted.

public CalendarDataModelItem[] getData(Date[] dateArray) {
    CalendarDataModelItem[] modelItems = new
                    CalendarDataModelItemImpl[dateArray.length];
      for (int i = 0; i < dateArray.length; i++) {
    CalendarDataModelItemImpl modelItem = new
                            CalendarDataModelItemImpl();
    modelItem.setEnabled(true);//Enable the date
  for(Date d : getDatesToBeHighlighted()) {//your method which returns an array 
                                                 //of dates which should be highlighted
          if(getDatePortion(d).compareTo(
                getDatePortion(dateArray[i])) == 0) {//comparing our date with dates in                                                      //dateArray
              modelItem.setStyleClass("green");                                 
  }
  }
  modelItems[i] = modelItem;
    }
    return modelItems;
  }

My CalendarDataModelItemImpl class is as below. It contains only several getter and setter methods.

import org.richfaces.model.CalendarDataModelItem;

public class CalendarDataModelItemImpl implements CalendarDataModelItem {
    private boolean enabled;
    private String styleClass;

    public void setEnabled(boolean enabled) {
        this.enabled = enabled;
    }

    public void setStyleClass(String styleClass) {
        this.styleClass = styleClass;
    }

    public boolean isEnabled() {
        return enabled;
    }

    public String getStyleClass() {
        return styleClass;
    }

    public Object getData() {
        return null;
    }

    public boolean hasToolTip() {
        return false;
    }

    public Object getToolTip() {
        return null;
    }

    public int getDay() {
        return 0;
    }
}

That is it.

Thursday, July 19, 2012

Compare two dates in two <rich:calendar> components

In this lesson Im going to show you how to compare the dates of two &lt;rich:calendar> components in a JSF page.

For an example think that you are creating a JSF page to enter employee details.
In that page you have two calendar components. One is to enter the join date and the other one is to enter the retired date of the employee.
So obviously join date should be earlier than the retired date. How do you validate whether join date is earlier than retired date and show a rich:message if validation failed?

1) Method 1 (For JSF users)
If you are not using JBoss SEAM, this method is for you. (Its obvious that SEAM users also can use this method.)

First, you have to create a validator class as below.


package inova;
import java.text.ParseException;
import java.text.SimpleDateFormat;
import java.util.Date;
import javax.faces.application.FacesMessage;
import javax.faces.component.UIComponent;
import javax.faces.component.UIInput;
import javax.faces.context.FacesContext;
import javax.faces.validator.Validator;
import javax.faces.validator.ValidatorException;


public class DateComparator implements Validator {
public void validate(FacesContext context, UIComponent component, Object date1) throws ValidatorException {
Date joinedDate = (Date) date1;
UIInput retiredDateComponent = 
           (UIInput) component.getAttributes().get("retiredDateComponent");

String dateString = (String) retiredDateComponent.getSubmittedValue();
System.out.println("dateString>" + dateString);
        String pattern = "yyyy/MM/dd hh:mm";
        SimpleDateFormat dateFormat = new SimpleDateFormat(pattern);
        Date retiredDate;
        try {
        retiredDate = dateFormat.parse(dateString);        
        } catch (ParseException e) {
            e.printStackTrace();
            return;
        }
        System.out.println("retiredDate> " + retiredDate);
if (joinedDate == null || retiredDate == null) {
            return;
}
        if (joinedDate.compareTo(retiredDate) > 0) {
        retiredDateComponent.setValid(false);
            throw new ValidatorException(new FacesMessage("Retired date should be 
                greator than joined Date"));
        }
    }
}
Now register your validator class in your 'faces-config.xml' file. To do it add the following lines directly within the <faces-config> tags.


<validator-id>dateComparator</validator-id>
  <validator-class>inova.DateComparator</validator-class>
</validator>
Note that 'dateComparator' is the name by using which you are going to access the validator in your page. You can give any name for this.

If you are using a date pattern in your second calendar(end date) component, you have to use the same date pattern in your validator class.
Your page will be as below.


<html xmlns="http://www.w3.org/1999/xhtml"
      xmlns:h="http://java.sun.com/jsf/html"
      xmlns:rich="http://richfaces.org/rich"
      xmlns:a4j="http://richfaces.org/a4j"
      xmlns:c="http://java.sun.com/jstl/core"
      xmlns:f="http://java.sun.com/jsf/core"> 


<head></head> 
<body>
  <h:form>
    Start date : 
    <rich:calendar id="cal_1">
      <f:validator validatorId="dateComparator"/>
      <f:attribute name="endDateComponent" value="#{endDate}"/>
    </rich:calendar>
    <br/>
    End date : <rich:calendar binding="#{endDate}" datePattern="yyyy/MM/dd hh:mm"/> 
    <br/>
    <rich:message for="cal_1" style="color:red;"/>
    <br/>
    <a4j:commandButton value="Save"/>
  </h:form>
</body> 
</html>

That is all. I think its clear for you what we have done.
♫ In our xhtml page we bind the 'end date calendar' component to the variable named as 'endDate' by using the 'binding' attribute of it.
♫ Then in our 'start date calendar' component, we use it as an attribute.
♫ In our validator class, we get that attribute by using the 'component.getAttributes().get(....)' method. Then we get the end date.
♫ If two dates are valid according to our criteria, we have nothing to do and if dates are invalid we throws a 'ValidatorException' with our own message.

2) Method 2(For seam users only)
This way is easier than the above method.
✱ The validator class is almost the same as above except three annotations are introduced before the class name as below.


@Name("dateComparator")
@org.jboss.seam.annotations.faces.Validator
@BypassInterceptors
public class DateComparator implements Validator {
..........
}
✱  Nothing to be put in faces-config.xml. It means you don't need to register your validator class in  faces-config.xml as in method1.

Enjoy......

Monday, July 9, 2012

Dynamically create tabs in <rich:tabPanel> component

In JSF you may have used <a4j:repeat> tag to repeat UI components. For an example you can use <a4j:repeat> tag as below to dynamically create several check boxes.

  <a4j:repeat value="#{userRoleList.resultList}" var="userRole">
    <h:selectBooleanCheckbox/>Click me<br/>
  </a4j:repeat>

The result will be as below.


But this doesn't work with <rich:tabPanel> and <rich:tab> components.
Is there any solution for this?
Yes, your old friend <c:forEach> component is still ready to help you.
Really you can use <c:forEach> of JSTL in your JSF page.
Following is an example. Required parts are colored.

<html xmlns="http://www.w3.org/1999/xhtml"
      xmlns:h="http://java.sun.com/jsf/html"
      xmlns:rich="http://richfaces.org/rich"
      xmlns:c="http://java.sun.com/jstl/core"> 


<head></head> 
<body>
  <rich:tabPanel switchType="client">
    <c:forEach items="#{userRoleList.resultList}" var="userRole">
      <rich:tab label="Tab#{userRoleList.resultList.indexOf(userRole) + 1}">
        I am tab no. #{userRoleList.resultList.indexOf(userRole) + 1}
      </rich:tab>
    </c:forEach>
  </rich:tabPanel>
</body> 
</html>

Final result will be as below.

Tuesday, July 3, 2012

How to use <rich:listShuttle> component


In 'ListShuttle' component you have two lists.
The left hand side list is the Source list.Right hand side list is the Target list. When moving an item between two lists, it is passed as a String. So you have to write a converter class to convert this String again to the object. So in order to do this correctly you may need to override the 'toString' method of the class
which you are using as the list item.

In this example I am using following 'UserData' calss to represent an item in the list. So my source list and
target lists has the type of 'UserData'.
Note that 'toString' method in 'UserData' has been overridden.

public class UserData {
String userName;
Integer userId;
public String getUserName() {
  return userName;
  }
public void setUserName(String userName) {
  this.userName = userName;
  }
public Integer getUserId() {
  return userId;
  }
public void setUserId(Integer userId) {
  this.userId = userId;
  }
  @Override
  public String toString() {
    return this.userId + "," + this.userName;
  }
}


My converter class is as below. It can convert a 'UserData' object to a String and, a String representation of 'UserData' object back to a 'UserData' object.
Following three annotations are must
@Name("userDataConverter") - This indicates the converter Id()
@Converter - This registers this class as a converter
@BypassInterceptors - Disabling interceptors.


import javax.faces.component.UIComponent;
import javax.faces.context.FacesContext;
import org.jboss.seam.annotations.Name;
import org.jboss.seam.annotations.faces.Converter;
import org.jboss.seam.annotations.intercept.BypassInterceptors;


@Name("userDataConverter")
@Converter
@BypassInterceptors
public class UserDataConverter implements javax.faces.convert.Converter {


  public Object getAsObject(FacesContext fContext, UIComponent uiComp, String value) {
UserData userData = new UserData();
String[] parts = value.split(",");
userData.setUserId(Integer.valueOf(parts[0]));
userData.setUserName(parts[1]);
return userData;
  }


  public String getAsString(FacesContext fContext, UIComponent uiComp, Object obj) {
UserData userData = (UserData) obj;
return userData.toString();
  }
}

My seam class which is bound to the page is as below.

import java.util.ArrayList;
import java.util.List;
import org.jboss.seam.annotations.Name;


@Name("myBean")
public class MyBean {
List<UserData> sourceData;
List<UserData> targetData = new ArrayList<UserData>();

public MyBean() {
sourceData = new ArrayList<UserData>();
UserData u = new UserData();
u.setUserId(100);
u.setUserName("John");
sourceData.add(u);
UserData u2 = new UserData();
u2.setUserId(101);
u2.setUserName("Kate");
sourceData.add(u2);
}

public List<UserData> getSourceData() {
return sourceData;
}

public List<UserData> getTargetData() {
return targetData;
}
}

Finally the ListShuttle component in my xhtml page is this.

    <rich:listShuttle sourceCaptionLabel="All users" targetCaptionLabel="Selected users"  orderControlsVisible="true"  sourceValue="#{myBean.sourceData}" var="userData" 
   targetValue="#{myBean.targetData}" converter="userDataConverter">
      <rich:column width="60px">
        <f:facet name="header">
          <h:outputText value="Username"/>
        </f:facet>
        <h:outputText style="cursor:pointer;" value="#{userData.userName}" />
      </rich:column>
      <rich:column width="60px">
        <f:facet name="header">
          <h:outputText value="Id" />
        </f:facet>
        <h:outputText style="cursor:pointer;" value="#{userData.userId}" />
      </rich:column>
    </rich:listShuttle>

Customize JSF selectOneRadio component

The general use of  '<h:selectOneRadio>' component is as below

    <h:selectOneRadio>
      <f:selectItem itemLabel=": Cheque" itemValue="1" />
      <f:selectItem itemLabel=":Cash" itemValue="2" />
    </h:selectOneRadio>

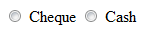
The appearance of finally rendered component is as below. The Select Items are laid horizontally by default.


If you want to arrange them vertically then change the 'layout' attribute as below.

    <h:selectOneRadio layout="pageDirection">
      <f:selectItem itemLabel="Cheque" itemValue="1" />
      <f:selectItem itemLabel="Cash" itemValue="2" />
    </h:selectOneRadio>


However if you want to place the labels of 'Select Items' components before the radio buttons you have to use css.


    <style>
      .myRad td {
          text-align:right;
      }
      .myRad td input {
          float:right;
          width:35px;
      }
    </style>


    <h:selectOneRadio layout="pageDirection" styleClass="myRad">
      <f:selectItem itemLabel="Cheque :" itemValue="1" />
      <f:selectItem itemLabel="Cash :" itemValue="2" />
    </h:selectOneRadio>

Final result will be as below.


Monday, February 27, 2012

EJBQL Delete Query Example

If you have worked with SEAM you may have used the method "entityManager.remove()" which is used to delete an entry from database. This method accepts one parameter, which is an entity.
(However the entity should be a managed one. Otherwise it throws an exception saying that you are trying to remove a detached object.)
You can use an EJBQL query to delete a record from database directly. In this case no managed entity is required. Following is an example query, which deletes one record from "Client" table.
It deletes the client whose clientId is 10.

DELETE FROM Client client where client.clientId = 10

Now I am going to use SEAM managed EntityManager to create a Query object as below and execute the query by calling it's "executeUpdate()" method.

Injecting EntityManager.
@In
EntityManager entityManager

Creating and executing query
Query q = entityManager.createQuery("DELETE FROM Client client where client.clientId                                       = 10");
q.executeUpdate();//delete row

Wednesday, February 15, 2012

How to create a popup in seam using <rich:ModalPanel/> component
(Seam, JSF, Richfaces)

In this popup a '' component is used as the popup.
In your page body, create a Modal Panel component as below. I am using the 'header' facet to display the title.

You can add more components such as tables, input fields, etc. between <rich:ModalPanel></rich:ModalPanel>
tags.
Look that I am using a command button to hide the popup.
<rich:modalPanel id="myPopup" width="600" height="400">
  <f:facet name="header"> 
    <h:panelGroup>
      <h:outputText value="Hello Popup!!"></h:outputText>
    </h:panelGroup>
  </f:facet>
  <a4j:commandButton value="Hide" id="btn_hide"
              onclick="Richfaces.hideModalPanel('myPopup');"/>
</rich:modalPanel>

That is it.
Now run your page and open it using a browser. It displays nothing. This is because components are hidden by default.
Now edit your page and add another button as below.

<a4j:commandButton value="Show" onclick="Richfaces.showModalPanel('myPopup');"/>

Note that in this button our javascript is "Richfaces.showModalPanel('myPopup');".
Now run your page and click on 'Show' button. You will see the popup. Now click the 'Hide' button and the popup will be closed.

Another Way To Show/ Hide Popup
Instead of using javascripts you can use a '<rich:componentControl/>' tags to show and hide the popup.
In that case your 'Show' button would be as below.
<a4j:commandButton value="Show" id="btn_show">
  <rich:componentControl for="myPopup" attachTo="btn_show"
        operation="show" event="onclick"/>
</a4j:commandButton>
'Hide' button can be changed as below.
<a4j:commandButton value="Hide" id="btn_hide">
  <rich:componentControl for="myPopup" attachTo="btn_hide" 
        operation="hide" event="onclick"/>
</a4j:commandButton>

Custom converter class
(Seam, JSF, Richfaces)

I'm going to show you how to write a custom converter class to let users to select and pass an Object using a JSF's <h:selectOneMenu/> component.
Since this component is finally rendered as a HTML 'select' element, it can't hold or submit Objects. So you need a converter class to convert the submitted value to matching Object type.
I am using following simple class as the seam component. Seam name of it is 'test'. (Instead of the seam component you can use a JSF managed bean also)
The combo box I'm going to use is filled with 'datesSelectList'.
The selected date is going to be set to 'selectedDate' variable.

import java.util.*;
import org.jboss.seam.ScopeType;
import org.jboss.seam.annotations.*;
import javax.faces.model.SelectItem;

@Name("test")
public class Test {
  List<SelectItem> datesSelectList = new ArrayList<SelectItem>();
  Date selectedDate;

  @Create
  public void init() {
    buildDatesSelectList();
  }

  public List<SelectItem> getDatesSelectList(){
    return datesSelectList;
  }

  public void buildDatesSelectList(){
    Date baseDate = new Date();
    Date date1 = new Date(baseDate.getTime());
    Date date2 = new Date(baseDate.getTime() + 5000);
    Date date3 = new Date(baseDate.getTime() + 10000);
    datesSelectList.add(new SelectItem(date1, "Date 1"));
    datesSelectList.add(new SelectItem(date2, "Date 2"));
    datesSelectList.add(new SelectItem(date3, "Date 3"));
  }

  public Date getSelectedDate() {
    return selectedDate;
  }

  public void setSelectedDate(Date selectedDate) {
    System.out.println("Date Selected : " + selectedDate);
    this.selectedDate = selectedDate;
  }
}

Your page would be as below.
<h:form>
  <h:selectOneMenu value="#{test.selectedDate}" id="sList">
    <s:selectItems value="#{test.datesSelectList}" var="_date"
       itemValue="#{_date.value}" label="#{_date.label}" />
    <f:converter converterId="myDateConverter"></f:converter>
  </h:selectOneMenu>
  <rich:message for="sList"/><br/>
  <a4j:commandButton value="submit"/>
</h:form>

Now it is time to write our converter class. To do that I will have to implement the interface 'javax.faces.convert.Converter'.
In this example the user selects a Date from combo box, and that date value should be set to the 'selectedDate' variable through 'setSelectedDate()' method.
So our converter should capture the label of the selected date('Date 1', 'Date 2' or 'Date 3') and find the relevant Date object.

package inova.erp.jbpm.temp;
import java.util.*;
import javax.faces.component.UIComponent;
import javax.faces.context.FacesContext;
import javax.faces.convert.Converter;
import javax.faces.model.SelectItem;
import org.jboss.seam.Component;


public class DateConverter implements Converter {
  
  public Object getAsObject(FacesContext context, UIComponent uiComp, String dateString) {
    System.out.println("dateString = " + dateString);
    Object obj = Component.getInstance("test");
    Test test = (Test)obj;
    List<SelectItem> selectItems = test.getDatesSelectList();
    for(SelectItem sItem : selectItems) {
      if(sItem.getLabel().equals(dateString)) {
        return (Date)sItem.getValue();//Finding matching Date
         object for selected label (dateString) 
      }
    }
    return null;
  }
  public String getAsString(FacesContext context, UIComponent uiComp, Object dateObj) {
    return null;
  }
}

Now our work is almost ok. The final part is we have to introduce our new "DateConverter" class as a converter. We can do it in 'faces-config.xml' as below.
<converter>
  <converter-id>myDateConverter</converter-id>
  <converter-class>  
    inova.erp.jbpm.temp.DateConverter
  </converter-class>
</converter>

Now build and run the page. Then select a value from combo box and press 'Submit' button.
You will see the output similar to 'Date Selected : Tue Feb 14 19:51:24 IST 2012' in your console.
It indicates that you have successfully selected a Date Object using your combo box.
Now remove the line
  '<f:converter converterId="myDateConverter"></f:converter>'
 and try again. You will get an error at submission.

Note Followings:

  • You can add the "converter" attribute to the <h:selectOneMenu/> and remove the <f:converter/> component as below.
    <h:form>
      <h:selectOneMenu value="#{test.selectedDate}" id="sList" converter="myDateConverter">
        <s:selectItems value="#{test.datesSelectList}" var="_date"
           itemValue="#{_date.value}" label="#{_date.label}" />
      </h:selectOneMenu>
      <rich:message for="sList"/><br/>
      <a4j:commandButton value="submit"/>
    </h:form>
  • If you are using seam, you can use the seam annotation '@Converter' together withe '@Name' annotation to define the converter instead editing 'faces-config.xml'.

    import org.jboss.seam.annotations.Name;
    import org.jboss.seam.annotations.faces.Converter;
    import org.jboss.seam.annotations.intercept.BypassInterceptors;
    @Name("myDateConverter")
    @Converter
    @BypassInterceptors
    public class DateConverter implements javax.faces.convert.Converter {

Tuesday, February 14, 2012

Reflect live back end data on webpage using <a4j:poll/> component
(Seam, JSF, Richfaces)

You can use <a4j:poll/> component to do following things.
1. Run a java method periodically. (Ex:- Run auto save method)
2. Rerender another component periodically to display recent data from database.
3. Periodically run a javascript.
4. To accomplish three of above at the same time.

<h:form>
  <a4j:poll interval="1000" reRender="txtAlertCount" action="#{myBean.queryFromDb()}"/>
</h:form>
<h:outputText value="#{myBean.rowCount()}" id="txtAlertCount" />

Main attributes:
interval - time duration in milliseconds
action - method to be invoked in given intervals
reRender - Id of the component to be re-rendered
oncomplete - Javascript function to run after action is completed.
onsubmit - Javascript function to run before form submission